
Complete Browser Image Redaction Guide: JPG, PNG, GIF & WebP
Photographs, screenshots, and scanned receipts carry identifying detail long after you have finished using them. A face in the background, a credit card on a desk, a client logo on a whiteboard鈥攖hese elements can turn an innocent portfolio sample into a privacy incident. The challenge is masking that detail without sending your source file through an unknown server or signing up for yet another cloud subscription.
This guide walks through browser-local image redaction from first principles: supported formats, drag-and-drop workflow, effect selection, and practical scenarios for freelancers and small teams. Every step assumes the same privacy model鈥?*your files stay on your device**鈥攊mplemented in the ToolVX redaction workspace.
Why Browser-Local Image Redaction Matters
Traditional online “blur my photo” services ask you to upload an image, wait for remote processing, and download a result from a URL that may linger in server logs or CDN caches. For personal snapshots that might be acceptable; for client invoices, medical forms, or unreleased product photography it is not.
Browser-local redaction reverses the trust model:
- The image is decoded in memory inside your browser tab
- You define mask regions and effects interactively on a canvas
- The sanitized image is encoded and downloaded directly to your disk
- No account is required for the core workflow, and no copy is transmitted to a vendor backend
That architecture makes redaction practical on restricted networks, client-owned laptops, and air-gapped review stations. It also eliminates an entire class of supply-chain risk: you are not betting your client’s confidentiality on someone else’s retention policy.
Supported Formats: JPG, PNG, GIF, and WebP
Modern redaction tools must handle the formats people actually receive鈥攏ot only pristine PNG exports from design software, but phone JPEGs, animated GIFs, and WebP assets from the web.
JPEG (JPG)
JPEG is the default output of most cameras and scanners. It uses lossy compression, which means repeated editing and saving can introduce artifacts around masked edges. For redaction, apply masks once on the highest-quality source you possess, then export. JPEG remains the best interchange format when file size matters鈥攅mail attachments, CMS uploads, and legacy portals almost always accept it.
PNG
PNG preserves sharp edges and supports transparency. It is ideal for screenshots, UI captures, and diagrams where lossless quality helps reviewers read surrounding context. Redacted PNGs are larger than JPEG equivalents but survive multiple save cycles without additional compression loss in the unmasked regions.
GIF
GIF supports animation and limited color palettes. Redacting a GIF requires processing each frame that contains sensitive content, or flattening animation to a static image if motion is not essential. For privacy work, confirm whether the animated sequence reveals temporal information鈥攕uch as a scrolling notification list鈥攖hat a single frame would miss.
WebP
WebP combines efficient compression with optional transparency. It is increasingly common on the web and in mobile pipelines. A capable local redactor decodes WebP to an internal bitmap, applies masks, and re-encodes to your chosen output format.
| Format | Typical use | Transparency | Animation | Redaction notes |
|---|---|---|---|---|
| JPEG | Photos, scans | No | No | Export once from best source; watch compression near mask edges |
| PNG | Screenshots, UI | Yes | No | Lossless; larger files; excellent for crisp text surrounds |
| GIF | Memes, simple motion | Yes (1-bit) | Yes | Check all frames; consider flattening if motion is unnecessary |
| WebP | Web assets, mobile | Optional | Optional | Decode fully before masking; choose output format deliberately |
Getting Started: Drag, Drop, and Open
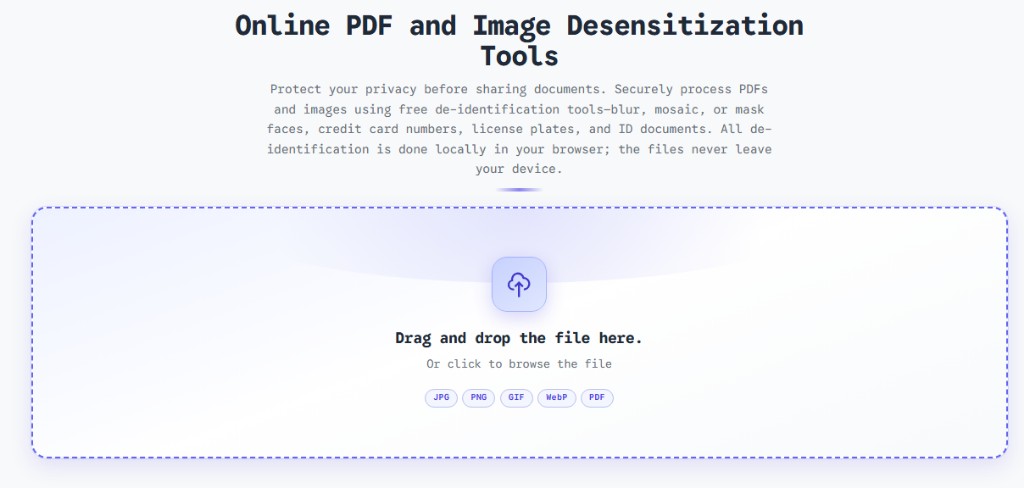
The fastest path to a redacted image is a zero-install browser workflow. ToolVX opens directly to an upload surface鈥攏o desktop agent, no plugin.
Opening Your First File
You can load an image in three equivalent ways:
- Drag and drop the file from your file manager onto the drop zone
- Click the drop zone and choose a file from the system picker
- Switch files later using the floating “open another file” control without leaving the editor
The interface accepts JPG, PNG, GIF, WebP, and PDF in the same workspace. If you are working with a multi-page PDF, thumbnail navigation appears along the side; for single images, you proceed straight to the canvas.
What Happens Under the Hood
When a file lands in the browser, the tool reads it as an ArrayBuffer, decodes it with built-in image APIs, and paints it to a canvas element. At no point is the buffer posted to a remote endpoint. Large files may take a moment to decode on low-power hardware, but that delay is local CPU time鈥攏ot upload bandwidth.
If you handle especially large panoramas or 40-megapixel RAW conversions, resize to a reasonable working resolution before redaction. You preserve privacy and improve responsiveness without changing the fundamental local-only guarantee.
Understanding the Three Redaction Effects
ToolVX offers three complementary ways to destroy readable detail in a selected region. Each writes new pixel values into the exported image rather than placing a reversible overlay.
Gaussian Blur
Gaussian blur convolves pixels in the masked area with a smooth kernel, producing a soft defocus reminiscent of a camera out of focus. It works well for:
- Faces in crowd scenes where harsh boxes would distract viewers
- Background signage that should not be readable but can melt into surroundings
- Screenshots where you want a subtle indication that content was altered
Blur is not the strongest choice for high-contrast alphanumeric strings in screenshots because determined analysts sometimes apply deblurring heuristics to small regions. For tax IDs and account numbers, prefer mosaic or solid fill. Learn more about why redaction reversibility matters.
Mosaic (Pixelation)
Mosaic downsamples the selected rectangle to large blocks, each filled with an average color from the source. The effect is visually unmistakable: viewers understand that information was intentionally obscured. Mosaic excels for:
- License plates and street numbers in street photography
- Serial numbers on hardware product shots
- Email addresses and phone numbers in support ticket screenshots
Because spatial frequency is crushed, mosaic resists casual OCR and human reading better than light blur.
Solid Fill
Solid fill replaces the region with a uniform color鈥攖ypically black or neutral gray. It offers the highest assurance that no underlying detail survives in the exported bitmap. Use solid fill for:
- Payment card numbers and CVV fields on invoice photos
- Signatures on contracts shared as portfolio samples
- Any credential appearing in a high-stakes compliance context
Legal and financial reviewers recognize solid boxes as deliberate redaction, which can speed approval when you document your process.
Step-by-Step Redaction Workflow
Follow this sequence for consistent, verifiable results on every image format.
Step 1: Prepare the Source Image
Work from the earliest quality version available. Duplicate the file if your editor overwrites originals on save. Note embedded metadata: phone photos may contain GPS coordinates in EXIF headers. Browser-local redaction focuses on pixels; if policy requires metadata stripping, use a separate metadata tool or export settings that omit EXIF.
Step 2: Load the File in ToolVX
Open the Free Client-Side Image and PDF Redaction Tool and drop your JPG, PNG, GIF, or WebP onto the upload surface. Wait for the canvas preview to stabilize. For GIFs, scrub through frames mentally鈥攊f multiple frames expose a secret, you will mask each relevant frame or convert to a static export.
Step 3: Draw Mask Regions
Click and drag rectangles over every area that must be obscured. Common targets include:
- Faces and name badges
- Government ID numbers and passports
- On-screen notification text
- Watermarked client logos you lack permission to display
- Reflections in glass that mirror documents or screens
Use separate masks for disjoint regions rather than one oversized box when you want to preserve surrounding context for legitimate storytelling.
Step 4: Choose an Effect per Region
Match the effect to sensitivity. Many workflows standardize on solid fill for credentials and mosaic for faces, applying blur only when aesthetics demand softer transitions. ToolVX lets you adjust the effect type before export鈥攅xperiment on a copy if you are unsure.
Step 5: Review at Full Zoom
Zoom to 100 percent and inspect mask edges. Semi-transparent compression artifacts near JPEG text can leak one or two characters if the box is too tight. Expand masks by a few pixels beyond the sensitive glyph bounds.
Step 6: Export and Verify
Download the redacted image. Open it in a different viewer than the editor, attempt to read obscured areas, and run OCR if your threat model includes automated scraping. Only then attach the file to email, upload to a portfolio, or paste into a ticket.
Step 7: Archive Policy
Keep unredacted originals in a secured location if law or contract requires retention. Never sync them to public cloud folders alongside redacted derivatives with similar filenames.
Format-Specific Tips and Pitfalls
JPEG Artifacts Around Text
Screenshots saved as JPEG often show ringing near black-on-white text. Masks should cover the full line height including ascenders and descenders. If artifacts remain outside the mask, consider re-exporting the surrounding document as PNG before redaction.
PNG Transparency
When redacting PNGs with alpha channels, verify the exported background behavior. Portfolio sites sometimes place images on non-white backgrounds; a transparent hole where a face used to be may look odd. Solid fill inside the mask avoids halo effects.
Animated GIF Considerations
If only one frame exposes a password notification, mask that frame or flatten the animation. Attackers can step through GIF frames as easily as you can.
WebP in Design Handoffs
Designers increasingly deliver WebP. Decode locally, redact, and export to the format your publisher requires鈥攐ften JPEG for photography blogs and PNG for interface documentation.
Freelancer Use Cases: Protecting Client Trust
Independent contractors routinely publish work samples without formal legal review. Image redaction is often the only control standing between a case study and an accidental data leak.
Portfolio Case Studies
You finished a dashboard redesign for a fintech client. Screenshots contain real transaction lists. Before posting on your website, redact names, account numbers, and balances with solid fill. Mosaic works for avatars if you want viewers to see human presence without identity.
Invoice and Contract Samples
Prospective clients ask for proof of billing complexity. Photographing or screenshotting an invoice risks exposing tax IDs, bank details, and addresses. Redact every numeric identifier and signature, then export JPEG at moderate quality for fast loading.
Social Media and Testimonials
Clients approve quotes but not their staff photos or office whiteboards visible in the background. Blur faces and mosaic proprietary roadmap sketches on the board before posting to LinkedIn or Instagram.
Bug Bounty and Support Screenshots
Security and support workflows generate images laden with tokens, session cookies, and internal URLs. Solid fill over URL bars and cookie values is faster than retyping synthetic examples. Local redaction means you never upload a live session capture to a third-party blur service.
Stock and Contract Photography
Photographers selling location shoots may need to obscure storefront names or license plates for model releases that did not cover commercial signage. Mosaic preserves composition while clearing legal risk.
Each scenario shares a requirement: process locally, verify visually, and keep a chain of custody note describing what you removed and which tool version you used.
Combining Image and PDF Redaction
Freelancers often receive PDFs that are effectively flattened scans鈥攏o selectable text. The same ToolVX workspace handles those files alongside native images. When a client sends a scanned contract PDF, redact sensitive paragraphs page by page, then export a flattened PDF. When they send a PNG export of a wireframe, stay in the image pipeline. One tool reduces training overhead and keeps privacy properties consistent.
Link bookmark: Free Client-Side Image and PDF Redaction Tool for both image and PDF workflows. For a full software comparison, see our image redaction software review.
Privacy Comparison: Local Browser vs. Cloud Upload Tools
| Concern | Cloud upload redactor | Browser-local ToolVX |
|---|---|---|
| Data leaves device | Yes, by design | No |
| Retention risk | Vendor-dependent | None on vendor servers |
| Works offline after load | No | Yes, after initial page load |
| Account requirement | Often yes | No for core editing |
| Suitable for client NDA material | Risky without review | Aligned with minimization |
| Effect types | Varies | Gaussian blur, mosaic, solid fill |
Choosing local processing is not paranoia鈥攊t is proportionate control when the asset class includes credentials, health information, or unreleased product imagery.
Accessibility and Communication
Redaction changes content for everyone, including assistive technologies. If you publish redacted images in educational material, add alt text that describes the purpose of the image without re-stating redacted facts. For example: “Dashboard screenshot with transaction details obscured for privacy” rather than repeating masked values.
When sharing with visually impaired stakeholders, provide a separate narration of non-sensitive takeaways instead of relying on them to interpret blurred regions.
Troubleshooting Common Issues
”My mask looks fine in the editor but fuzzy after export”
Check output format and quality settings. JPEG export at very low quality can introduce new artifacts adjacent to masks. Increase quality or switch to PNG.
”Part of a GIF is still readable”
Advance through all frames. Sensitive content may appear only briefly in animation loops.
”The file won’t load”
Extremely large images may exceed browser memory limits on older devices. Downscale externally, then redact.
”I need the same mask on twenty similar screenshots”
Develop a personal checklist of regions鈥攕tatus bar, username, account panel鈥攁nd apply masks systematically. Consistency reduces missed spots during deadline crunches.
Conclusion: Redact Once, Publish with Confidence
Images leak secrets through faces, metadata, reflections, and frames users forget to check. Browser-local redaction with Gaussian blur, mosaic, and solid fill gives you a practical way to publish work samples, support evidence, and social content without shipping originals to a remote processor.
Load your JPG, PNG, GIF, or WebP into the Free Client-Side Image and PDF Redaction Tool, mask every sensitive region, choose the effect that matches your threat model, and verify the export before it leaves your machine. That workflow is fast enough for daily freelancer use and rigorous enough to respect client trust.
Privacy is not a filter you slap on after the fact. It is a deliberate step in how you handle pixels鈥攁nd with the right local tools, it can be a step you never outsource.