
The Complete Guide to Photo Redaction: How to Permanently Mask Sensitive Image Data
Whether you are sharing an invoice on social media or emailing a government ID, proper photo redaction is the only thing keeping your personal data safe from bad actors.
A single unmasked photo can expose your address, financial details, or identity. This guide shows you exactly how to do it right. No guesswork. No risky tools. Just permanent, secure masking.
Why Visual Layers Aren’t Enough for Safe Photo Redaction
Most people reach for their phone’s built-in markup editor. They draw a black rectangle over sensitive text. They think the job is done.
It is not.
The Markup Editor Problem
Smartphone markup tools add a semi-transparent vector layer on top of the original image. The underlying pixels remain completely intact. Here is what that means in practice:
- Color inversion — A simple filter reveals the hidden text beneath the overlay.
- Layer removal — Image editors like Photoshop can strip the markup layer entirely.
- Metadata scraping — EXIF data, GPS coordinates, and camera info survive the “redaction.”
What True Photo Redaction Requires
Secure photo redaction must permanently alter pixel values at the byte level. There are only two valid approaches:
- Solid color replacement — Overwrite the original pixels with an opaque color block. The original data is gone forever.
- Pixel scrambling — Apply high-density mosaic that destroys facial features and text patterns irreversibly.
Anything less is concealment, not redaction. For a detailed technical analysis of why reversible masking fails, see our investigation into redaction reversibility.
Step-by-Step Tutorial: How to Execute Irreversible Photo Redaction
Follow these four steps to permanently mask sensitive data in any image or PDF.
Step 1: Upload Your File
Open the Free Client-Side Image and PDF Redaction Tool in your browser. Drop your image or PDF onto the canvas. No upload to any server. No registration. No email required.
Step 2: Drag to Select Sensitive Areas
Click and drag to draw bounding boxes around the data you want to mask. Common targets include:
- Faces — Protect identity in group photos or ID documents.
- Text fields — Black out addresses, phone numbers, and financial figures.
- Signatures — Erase handwritten signatures from scanned forms.
- Barcodes and QR codes — Remove scannable identifiers.
Step 3: Apply Your Preferred Masking Layer
Choose from three secure mask styles:
- Solid Color Fill — The most secure option. Completely overwrites pixels with an opaque color.
- High-Density Mosaic — Pixel-scrambling that destroys patterns at the pixel level.
- Fuzzy Blur — Gaussian blur at a high radius. Acceptable for non-critical data.
Step 4: Export the Newly Generated Image
Click the download button. The tool generates a clean file with all redactions permanently baked in. No layers to remove. No metadata to scrape.
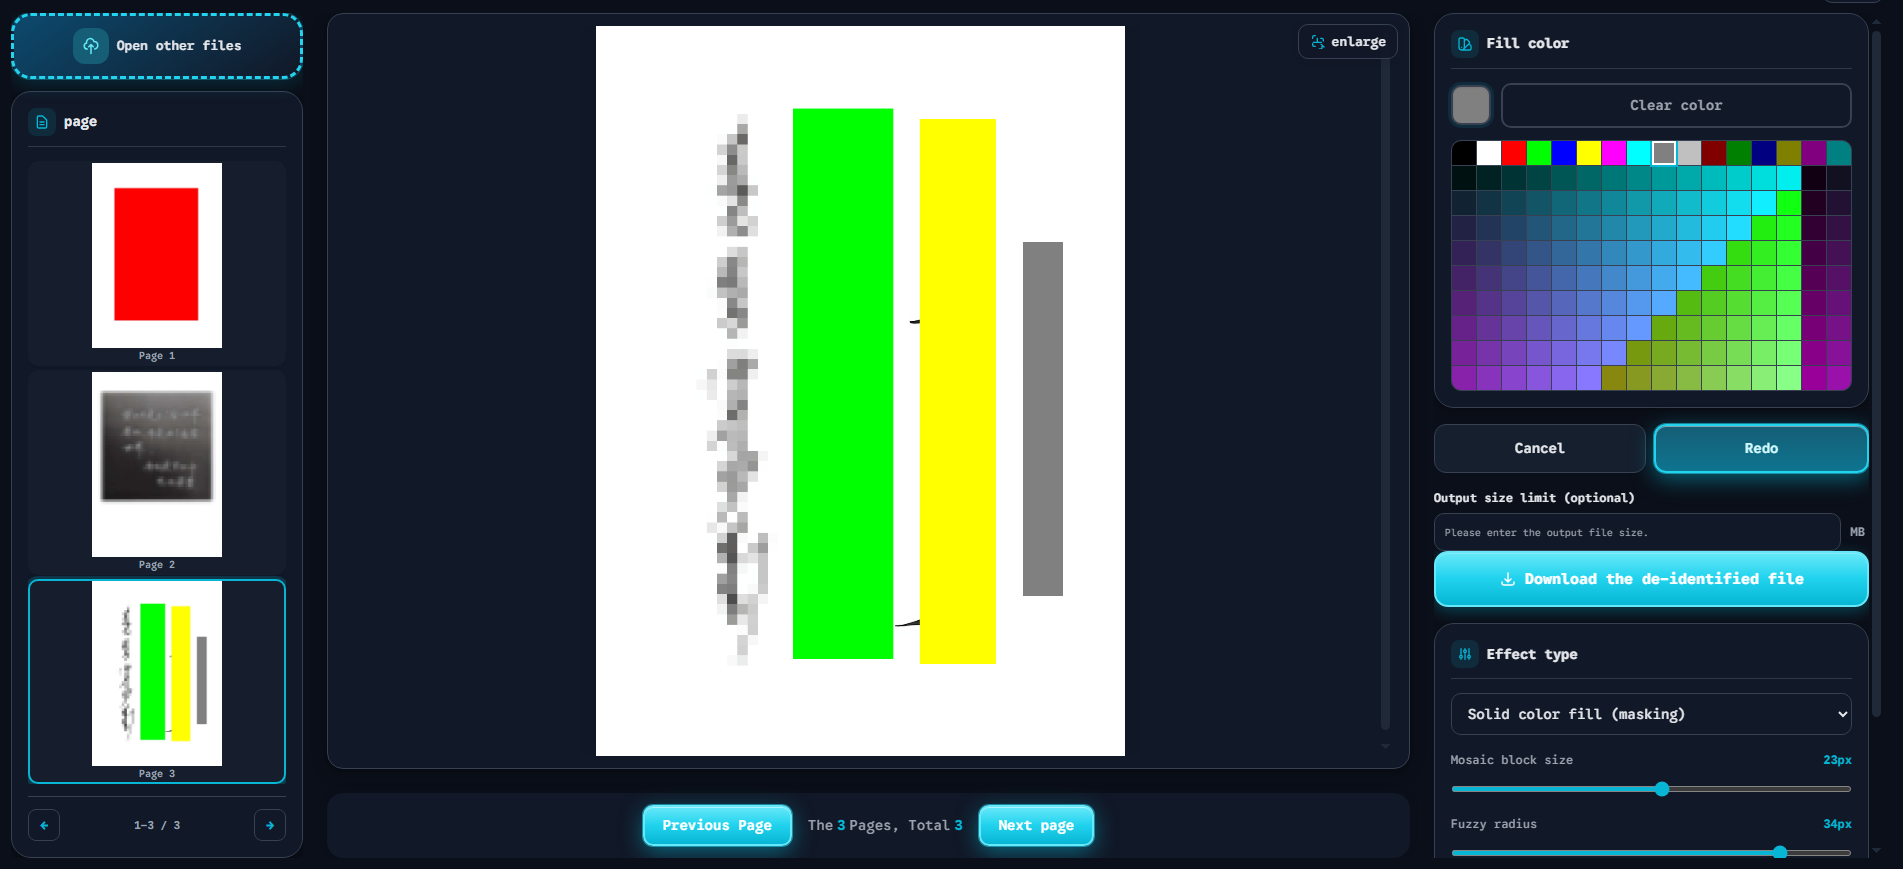
The interface above shows a professional secure image masking guide in action. The right sidebar provides advanced configurations: Solid Color Fill (shown as the clean red box over the document), a high-density Mosaic grid for pixel-level scrambling, and Fuzzy Radius sliders for adjustable blur intensity. Page thumbnails on the left enable quick navigation across multi-page PDFs.
Choosing Between Client-Side and Server-Side Photo Redaction
Not all online tools are equal. The architecture behind the tool determines your privacy risk.
The Danger of Server-Side Processing
Many “free” online editors upload your files to remote servers. They claim to delete files after processing. You have no way to verify this. Your photo could be:
- Retained — Stored indefinitely on company servers.
- Leaked — Exposed through a data breach or insider threat.
- Sold — Used to train AI models or sold to third parties.
Why Client-Side Photo Redaction Wins
A client-side tool performs all computation inside your browser. Your image data never leaves your device. The advantages are clear:
- Zero data exposure — No uploads means no server-side risk.
- Zero logs — Nothing is recorded. Nothing is stored. Nothing is tracked.
- Instant speed — No waiting for server round-trips. Processing happens in milliseconds.
- Full compliance — Meets GDPR and CCPA requirements for data minimization.
Our tool, the Free Client-Side Image and PDF Redaction Tool, uses this exact architecture. All photo redaction happens locally in your browser via WebAssembly and Canvas APIs. Zero logs. Zero uploads. Zero risk.
Conclusion & FAQ
Proper photo redaction is a essential skill for anyone who shares digital files. Built-in phone tools create a false sense of security. Server-side editors introduce unnecessary privacy risks. The solution is simple: use a client-side tool that permanently destroys pixel data in your browser.
Frequently Asked Questions
Is photo redaction permanent?
Yes, when done correctly. Solid color fill and high-density mosaic permanently overwrite the original pixel data. The original information cannot be recovered by any method. Avoid tools that use translucent overlays or reversible layers. Learn more about why redaction reversibility matters.
Can someone reverse a blurred image?
It depends on the blur intensity. A low-radius blur can often be reversed by AI deblurring tools. A high-radius Gaussian blur is much harder to reverse but still not guaranteed. For maximum security, always use solid color fill instead of blur.
What is the best free tool to redact photos online?
The Free Client-Side Image and PDF Redaction Tool is a free, browser-based tool that requires no registration. It performs all photo redaction client-side, meaning your files never upload to a server. It supports images (JPG, PNG, WebP) and PDFs with three mask styles: Solid Fill, Mosaic, and Blur.