
Image Anonymization: Blurring Faces, IDs & License Plates in the Browser
Every day, professionals share screenshots, product photos, and field documentation that accidentally expose people, government IDs, payment cards, and vehicle license plates. A single unredacted frame in a support ticket, press release, or research dataset can trigger privacy complaints, regulatory fines, or reputational damage. The challenge is not whether to anonymize 鈥?it is how to do it quickly, correctly, and without sending sensitive files to a third-party server.
Browser-local image anonymization solves this problem by keeping every pixel on your device. You draw redaction regions directly over faces, credentials, and plates, apply a permanent visual effect, and export a sanitized copy. No upload queue, no cloud API key, no retention policy to negotiate. This guide explains what to anonymize, which effect to choose, and how to build a repeatable workflow using ToolVX browser redaction.
Why Image Anonymization Matters Beyond “Common Sense”
Privacy regulations do not distinguish between a formal portrait and a casual screenshot. If a file contains identifiable personal data 鈥?a face, a name on an ID card, a readable license plate 鈥?it may fall under GDPR, HIPAA, CCPA, or sector-specific rules governing research ethics and journalism.
Real-world scenarios that demand anonymization
- Customer support teams attach screenshots showing account dashboards, error dialogs, or mobile app screens that include profile photos and email addresses in the header bar.
- Researchers and journalists publish field photos where bystanders, storefront signage, or vehicle plates appear in the background.
- Real-estate and insurance adjusters photograph property damage alongside mailboxes, delivery labels, and neighbor vehicles.
- HR and training departments create internal documentation from video conference stills where participant thumbnails remain visible.
- Developers and QA engineers share bug reports with login screens, QR codes, and API keys rendered in the UI.
In each case, the sensitive element is visual 鈥?not searchable text. Copy-pasting into a word processor cannot help. You need spatial redaction: a mask drawn at exact coordinates over the region that must disappear.
The cost of getting it wrong
Superficial edits create a false sense of security. Placing a semi-transparent sticker over a face in a photo editor leaves the original pixels intact beneath the layer. Cropping out a plate but leaving a reflection in a window may still reveal the number. Uploading the file to a “free online blur tool” creates a second copy of the data on infrastructure you do not control.
True anonymization destroys or replaces the underlying pixel data in the exported file. That distinction separates compliant workflows from cosmetic touch-ups.
Browser-Local Processing: The Privacy Foundation
Cloud-based anonymization services ask you to upload the original image, process it on their servers, and download a result. Even with encryption in transit, you are still creating a copy outside your environment. For regulated industries, that single transfer may require a data processing agreement, a legal basis under GDPR Article 6, and an audit trail.
Local browser processing eliminates the transfer entirely:
- You select a file from disk.
- The browser decodes it into an in-memory canvas.
- You apply redaction effects that rewrite pixels inside each region.
- You export a new file 鈥?the original on disk is never modified unless you overwrite it yourself.
ToolVX redaction follows this model for JPG, PNG, WebP, and GIF images as well as PDF documents. The tool runs entirely in your tab. Closing the tab clears the working memory. There is no account requirement and no server-side storage of your uploads 鈥?because there are no uploads.
What to Anonymize: A Practical Checklist
Not every element in a photo requires masking. Focus on identifiers that connect an image to a specific person, account, or vehicle.
Faces and bodies
Human faces are the most recognizable biometric identifier in casual imagery. Anonymize:
- Primary subjects when you lack consent for publication
- Bystanders in street photography and event coverage
- Profile avatars visible in screenshots of social or messaging apps
- Thumbnail grids in video conference captures
For group scenes, err on the side of masking every visible face unless you have documented consent from each individual.
Government IDs and credentials
Identity documents carry structured data that is trivial to OCR even after mild compression:
- Passport and national ID card numbers
- Driver license numbers and barcodes
- Student and employee badge photos with printed names
- Residence permit and visa stickers
Redact the entire card region, not just the number field. Partial masking often leaves enough context 鈥?photo, nationality, date of birth 鈥?to reconstruct identity.
License plates and vehicle identifiers
Vehicle registration plates link a physical object to an owner in many jurisdictions. Also watch for:
- Fleet numbers and company logos on commercial vehicles
- VIN stickers visible through windshields in dealership photos
- Parking permit hangtags with unit numbers
Plates are small but high-contrast. A tight mosaic or solid fill box works better than a wide soft blur that might leave characters readable at the edges.
Secondary identifiers people overlook
- QR codes and barcodes 鈥?often encode URLs, payment requests, or account tokens
- Handwritten notes on whiteboards and sticky notes in office photos
- Shipping labels on packages in unboxing videos
- Reflections in mirrors, glass doors, and device screens
- Metadata overlays 鈥?some cameras burn GPS coordinates or serial numbers into the image corner
Choosing the Right Redaction Effect
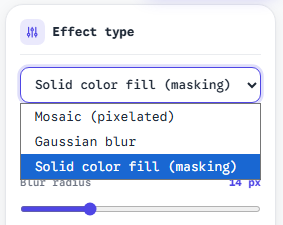
ToolVX offers three core effect types, each suited to different content and audience expectations.
Gaussian blur
Blur applies a smooth falloff that obscures fine detail while preserving general color and shape. It works well for:
- Faces in crowd scenes where a harsh block would look unnatural
- Background signage that is not the focal point
- Softening large regions where exact edges are imprecise
Blur is not ideal for dense text or high-contrast numbers. OCR engines can sometimes reconstruct short digit strings from lightly blurred ID fields. When in doubt, combine blur with a slightly larger selection box.
Mosaic (pixelation)
Mosaic reduces local resolution by averaging pixels into visible blocks. It is the standard choice for:
- ID numbers and license plates
- Credit card PANs visible in checkout screenshots
- Small high-contrast text in mobile UI captures
Mosaic communicates clearly to viewers that information was intentionally removed 鈥?useful in compliance documentation where auditors expect an obvious redaction marker.
Solid fill
Solid fill replaces the selected region with a flat color (typically black or white). Use it when:
- You need maximum certainty that no underlying detail survives
- The redacted area sits on a uniform background
- You are preparing evidence files where any residual pattern is unacceptable
Solid fill is the most conservative option for legal and forensic contexts.
| Content type | Recommended effect | Why |
|---|---|---|
| Faces in editorial photos | Gaussian blur | Natural appearance; obscures features |
| Passport / ID cards | Mosaic or solid fill | Destroys OCR-readable structure |
| License plates | Mosaic | Blocks character shapes at any zoom |
| QR codes & barcodes | Solid fill | Eliminates encoded data entirely |
| UI screenshots with tokens | Solid fill | No gradient leakage around text |
| Large crowd backgrounds | Blur (wider box) | Efficient coverage of many small faces |
Step-by-Step Workflow in the Browser
The following workflow applies to any supported image format. PDF pages follow the same redaction mechanics once rendered to canvas.
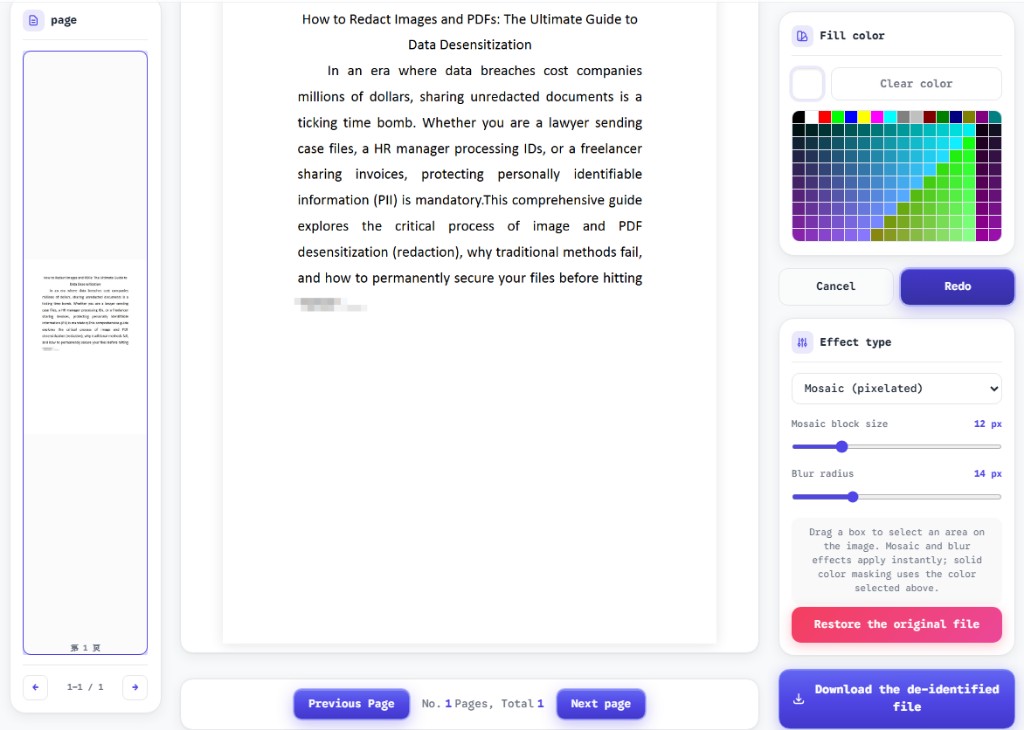
1. Import without uploading
Open ToolVX redaction and load your file via drag-and-drop or the file picker. The image appears in the editor viewport. Verify orientation and resolution 鈥?very large files may require a moment to decode, but processing remains local.
2. Zoom to the sensitive region
Use the canvas zoom controls to frame the area precisely. Accurate selection matters: a box that is too small leaves readable pixels at the corners; a box that is too large obscures context your audience still needs.
3. Draw the redaction region
Click and drag to create a rectangle over the target. For multiple items 鈥?several faces, two plates, an ID in the foreground 鈥?create separate regions. Each can use a different effect if needed.
4. Select the effect type
Open the effect dropdown and choose blur, mosaic, or solid fill. Preview the result immediately on canvas. Adjust the region or switch effects until no identifiable detail remains at 100% zoom.
5. Review at full resolution
Zoom back out and scan the entire frame for missed identifiers: reflections, secondary screens, thumbnails in browser tabs, metadata burned into corners. This review step prevents the most common anonymization failures.
6. Export the sanitized copy
Download the redacted image. Keep the original segregated 鈥?ideally in an access-controlled folder 鈥?and distribute only the exported file. Rename exports clearly (incident-2026-07-10-redacted.png) so team members do not confuse versions.
7. Document your process (for regulated teams)
Record who redacted the file, which tool was used, and confirmation that processing occurred locally. This audit note supports GDPR accountability and internal security policies without requiring screenshots of the tool itself.
Format-Specific Considerations
JPG and JPEG
Lossy compression can leave faint ghosting around high-contrast edges after redaction. Export at quality 90 or higher when the downstream use allows it. Re-redacting an already-compressed JPG that was previously published without masks may not recover burned-in pixels from the first export 鈥?always start from the highest-quality original.
PNG
PNG preserves sharp edges and supports transparency. Redaction effects apply cleanly. If the source uses an alpha channel (e.g., UI assets), ensure your fill color matches the intended background when replacing transparent areas.
WebP
WebP is increasingly common for web screenshots and Android captures. Browser decoding is widely supported; treat WebP like PNG for redaction purposes.
GIF
Animated GIFs require redacting every frame where sensitive content appears. If ToolVX processes GIFs as static first frames or full animations, verify behavior on a test file before batch processing memos or chat exports.
Multi-Subject and Batch Workflows
When a single image contains many faces 鈥?a conference hall, a protest, a classroom 鈥?work systematically from one corner to the opposite. Use mosaic for small repeated elements (badges, plates) and blur for larger face regions.
For recurring tasks (weekly support screenshot reviews), maintain a team checklist:
- Load file locally in ToolVX
- Redact all faces, IDs, plates, and QR codes
- Second reviewer spot-checks at 100% zoom
- Export and attach only the redacted version to tickets
Batch volume does not justify cloud upload shortcuts. A local tool scales with your team’s discipline, not with a vendor’s retention schedule.
Anonymization vs. Pseudonymization
Regulations distinguish between removing identity (anonymization) and replacing it with a reversible token (pseudonymization). Pixel redaction aims at anonymization: the exported image should not allow reasonable re-identification given available means.
If you maintain a separate mapping table linking redacted files to originals, you are pseudonymizing the archive 鈥?not the published copy. The published copy must still withstand scrutiny on its own.
Common Mistakes to Avoid
- Redacting only the “obvious” face while leaving a name badge, nameplate, or reflection
- Using low-opacity overlays in general-purpose editors instead of destructive pixel replacement
- Trusting crop alone when sensitive data sits near the frame edge or in metadata
- Re-sharing the original alongside the redacted version in the same email thread
- Skipping plate redaction in automotive journalism because “the story is about the car, not the owner”
When Browser Redaction Is the Right Tool
Choose local browser anonymization when:
- Files must not leave your network or jurisdiction
- You need immediate results without IT provisioning a server-side pipeline
- You handle mixed content 鈥?photos and PDF scans 鈥?in one interface
- Compliance reviewers require proof that no third party received the source file
Free Client-Side Image and PDF Redaction Tool is designed for exactly these constraints. It pairs spatial redaction with permanent effect rendering, so the file you distribute is the file you reviewed on screen. For a step-by-step workflow, see our complete guide to photo redaction.
Conclusion
Image anonymization is a spatial discipline. Faces, IDs, and license plates do not hide behind keyword filters or document search 鈥?they sit at specific coordinates in a frame, waiting for a careless export. Blurring, mosaicking, or filling those regions in the browser gives you direct control without surrendering custody of the original.
Start from the highest-quality source, select effects matched to each content type, review at full zoom, and export a clean copy. Keep your processing local, document your steps, and treat every screenshot as potentially identifiable until proven otherwise. Open the Free Client-Side Image and PDF Redaction Tool and anonymize your next image entirely on your device. For a deeper technical analysis of why reversible masking fails, see our investigation into redaction reversibility.